
Looking for a little server that runs 24x7 for whatever various project you have? Maybe you want to host your own websites, create a Discord bot, setup a VPN server, run a reverse proxy to your home network, or one of the many amazing things you can do with a highly available server. Did you know that Google gives out free servers? It's true!

Now that might sound too good to be true, but I'm happy to tell you that it's not. There are some caveats though and I'll outline those before we get started.
Google Cloud Platform
First off, let's talk about the server. It's actually a Virtual Machine (VM) and it's hosted on Google's Cloud Platform (GCP) which is their equivalent to Amazon's AWS (Amazon Web Services) and Microsoft's Azure. All of these are massive "clouds" which basically means hundreds of geographically different locations hosting hundreds of thousands of physical servers. In the case of this blog post we'll be talking about a teeny tiny slice of those clouds that Google gives out for free. Google actually gives out A LOT of free services on GCP, but the one we care about today is the Compute Engine, their name for a VM. Their free tier includes one e2-micro VM which has the following specs:
- 2 vCPUs (this resource is shared with other users and can "burst" to 100% for 30 seconds at time)
- 1GB of RAM
- 30GB of HDD storage (Standard persistent disk)
- 1GB of egress bandwidth per month (traffic that leaves the network)
- Unmetered ingress bandwidth (you are not charged for traffic that goes to your VM)
- 1 External IPv4 and IPv6 address
- Internal (private) IPv4 addresses
- Oregon, Iowa, or South Carolina regions only
Now some of this sounds pretty good for FREE, while some of them sound a bit worrisome, especially the bandwidth. The cost for bandwidth on GCP is about $0.09 per GB so 10GB would be about 85 cents while 100GB would be about $8.50 so you can see how that adds up quickly. Thankfully that's only outbound bandwidth so if you're downloading content like performing updates, that's all free. I would highly suggest using a CDN like Cloudflare if you were going to host your own website on this free plan just to get the most out of your free bandwidth. Here's some stats on my primary website (KuJoe.net) for the month of June 2023, keep in mind that I don't use a CDN so this is straight traffic:
- Total visitors: 710
- Total hits: 44,640
- Total traffic: 258.21MB
As you can see 1GB can be plenty for a personal website or hosting a private site for a group of friends. If you're truly worried about unexpected bills, you can setup alerting to notify you when you use a certain amount of outbound bandwidth is used. I might write a separate guide for that because it's a bit more in-depth because of how customizable the alerting system is for GCP.
So now that you have all of the background behind this, are you ready to get started?
Creating the VM instance
NOTE: You will need a credit card to access the free tier. Virtual credit cards work just fine, I created a virtual credit card and deleted it after getting access.
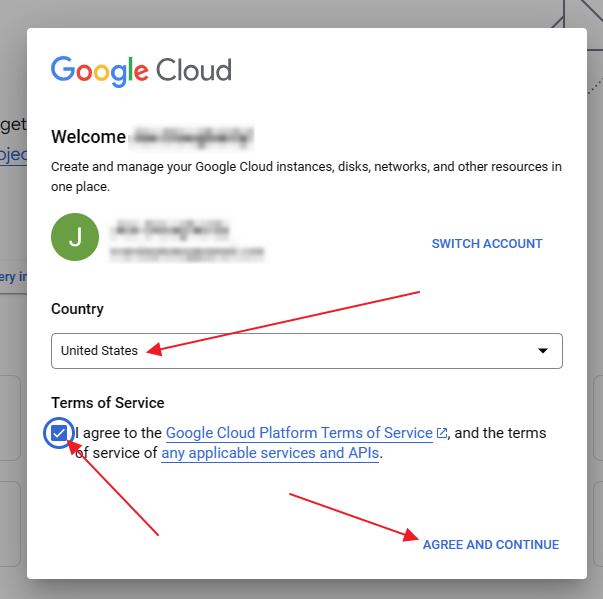
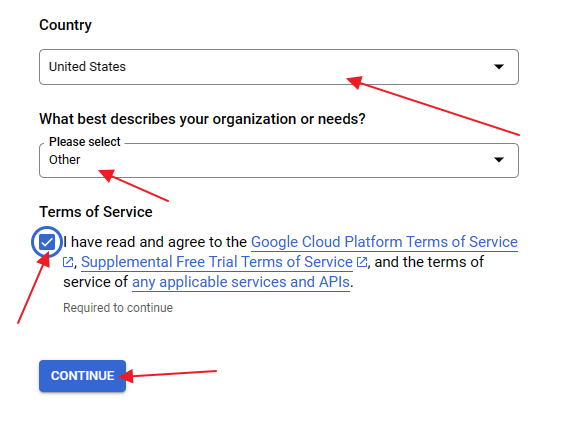
- Create a Google account if you don't already have one, once you have one go to https://console.cloud.google.com and set your country and accept the Terms of Service.
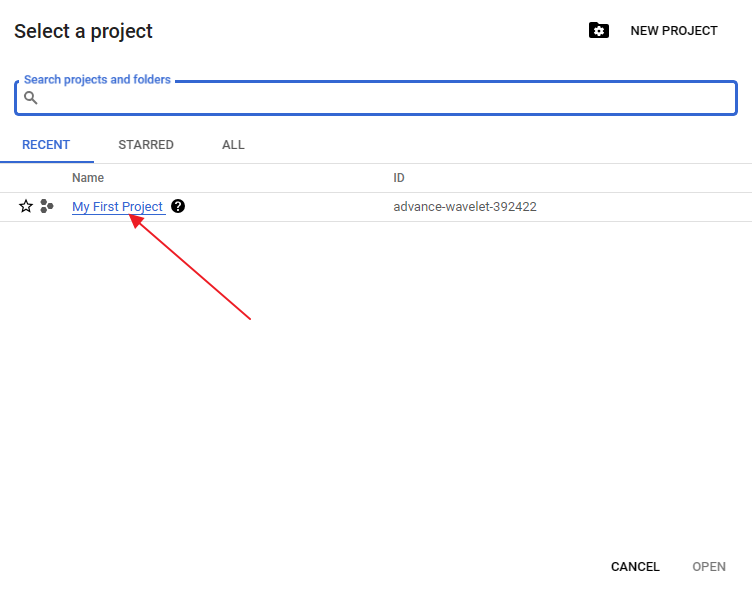
- Select a project by clicking the "Select a project" dropdown (a starter project should already exist) and clicking on the project name.

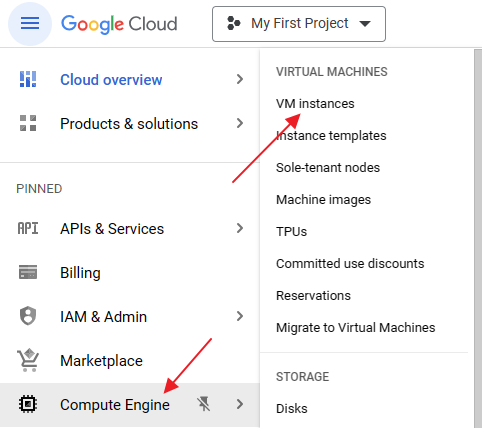
- Once in the project, navigate to the Compute Engine section by clicking on it on the lefthand menu or searching in the search bar at the top.

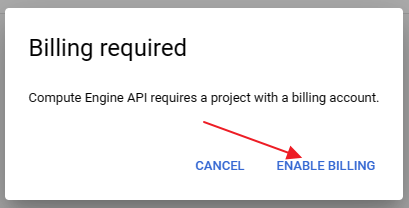
- Click on the "ENABLE" button to enable the Compute Engine API.

- A billing account is required to enable this, click on "ENABLE BILLING".
- Select your country from the drop down menu, then select the appropriate answer for the second question, then check the box after reading all of the Terms of Service and other documents, and lastly click the "CONTINUE" button.
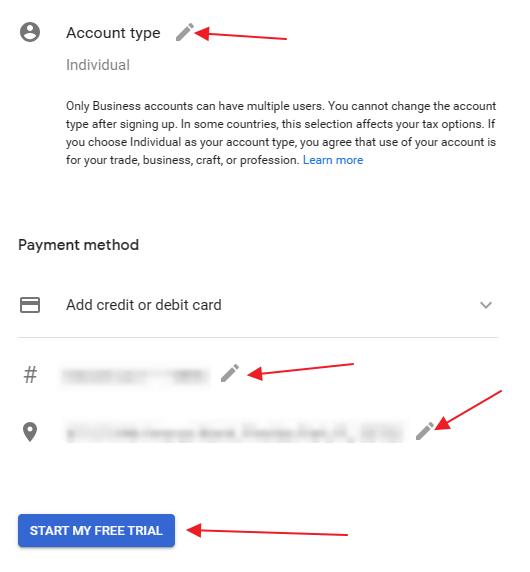
- Change the account type to "Individual" if applicable and then enter your billing information (again, a virtual credit card will work and you are not billed for the free tier). Then click the "START MY FREE TRIAL" button.
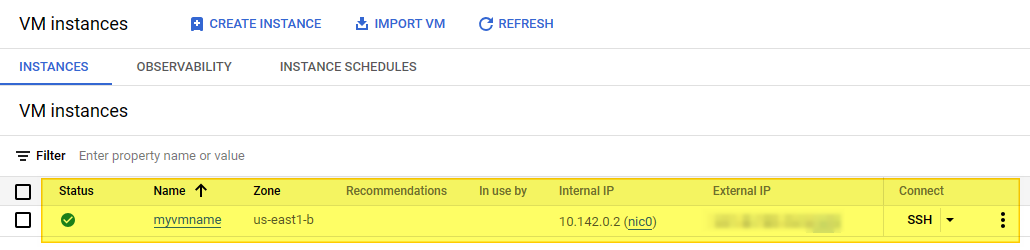
- Once the Compute Engine API is enabled (may take a few minutes), go to the "VM instances" area inside of the Compute Engine section and click "CREATE INSTANCE".

- On the VM instance creation screen change the following values:
- Name - Select a name for your new VM
- Region - Select us-west1, us-east1, or us-central1
- Machine configuration - General purpose
- Series - E2
- Machine type - e2-micro
- Display device - Enable display device (not required, but helpful sometimes)

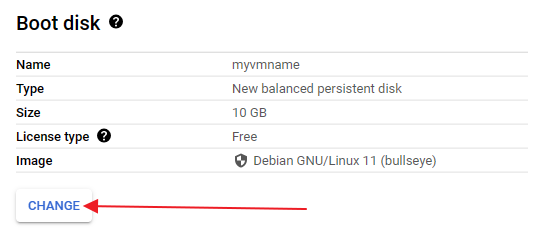
- Under "Boot disk" click the "CHANGE" button.
- Select/configure the following items and click the "SELECT" button:
- Operating system - Pick a Linux OS of your choice.
- Version - Leave default or pick the version you want.
- Boot disk type - Standard persistent disk
- Size - 30
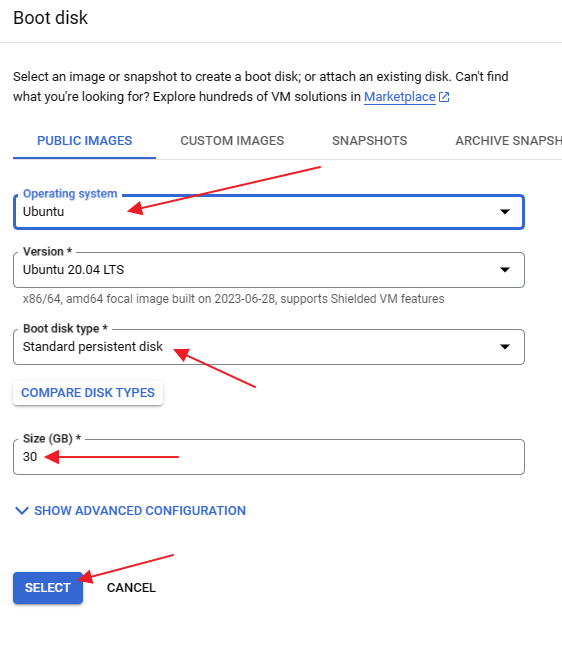
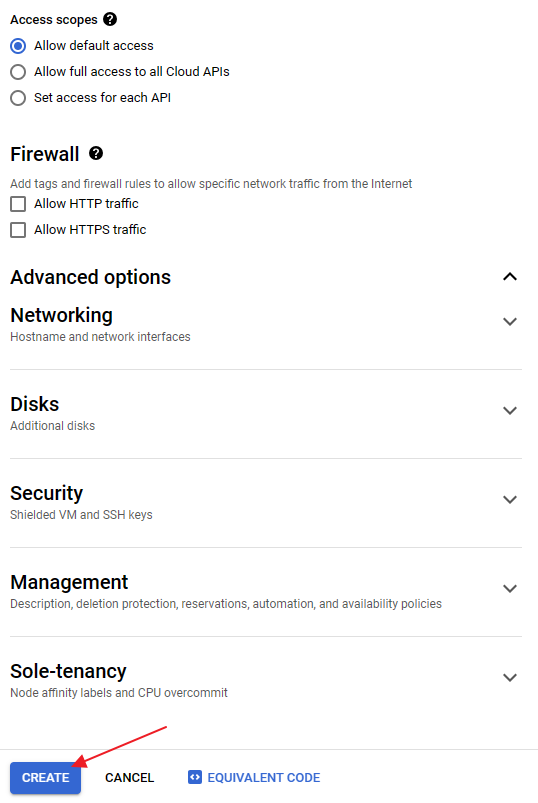
- All of the other settings are optional, you can go research them if you'd like or just leave them as the defaults. Click the "CREATE" button at the bottom.
- Now wait for your new VM to be created! This might take a bit since these 3 regions are pretty popular.
Accessing the VM for the first time
Once the VM is created an online, you'll want to login using the SSH console to configure your VM and setup login credentials (or just always use the SSH console, your choice).
Click on the down arrow next to SSH for your new VM on the instance list then click "Open in browser window".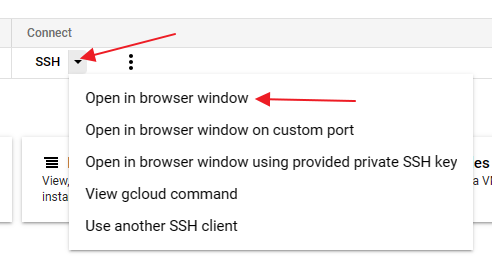
And that's it. Why did I bother making that a numbered list? Who cares, after a minute or so you'll be logged into your VM and from there you can switch to the root account (or use sudo commands) and you can also upload and download files from this console interface. Enjoy!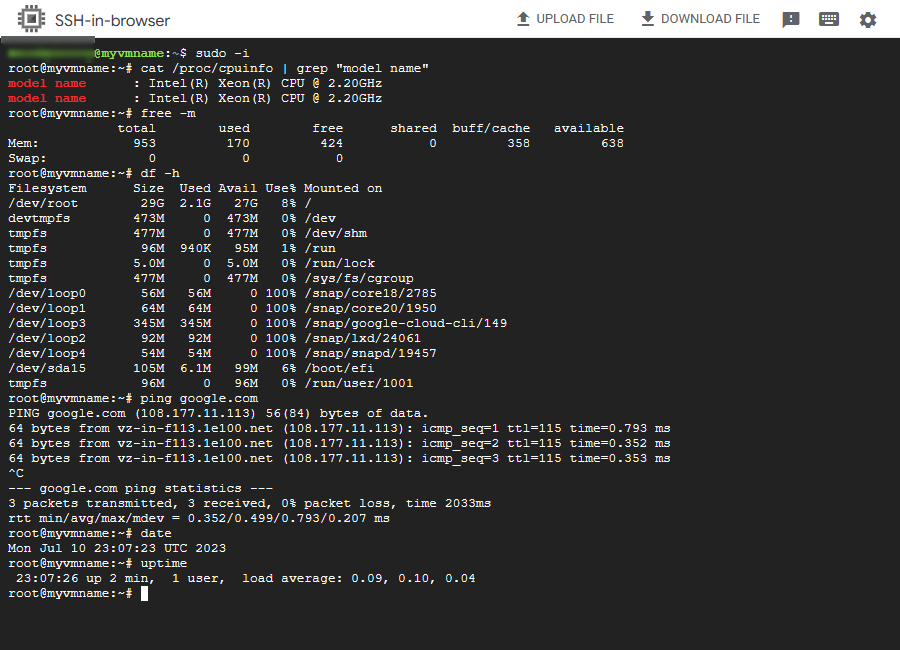
Go out and do good things!
-KuJoe